Concrete anchors are instrumental in securing everything from household shelving to streetlights to hydroelectric dams. This guide from the Power Bolt and Tool, the leading Florida fastener supplier, gives an overview of the types of concrete anchors available, the applications that best suit them, and how best to install them. Always refer to the manufacturers’ instructions for optimal results.
Anchors works by inserting them into holes in the concrete or masonry base material then expanding them to “grip” the hole walls to hold fixture via bolts or screws. Anchors can be divided into two general groups: male and female.
Preparing to Install Anchors

Properly installed anchors begin with properly drilled holes. After donning gloves, safety goggles and hearing protection, fit a hammer drill with a carbide-tipped bit. The hammer drill will break up the concrete as it bores and will ensure the correct hole geometry. Drill slightly deeper than the anchor’s length. While you will want to clean the hole of as much dust and particles as possible, bits of broken concrete or brick that cannot be cleaned out will fall to the bottom of the hole, where it will not interfere with the fastener’s function. ANSI-compliant Carbide bits match the fastener’s tolerance. Remember, the bit should be the same diameter as the bolt if you are using a male anchor; it should be the outside diameter of the shell if using a female.
Female Anchors
Female anchors, such as drop-ins and lag shields, are sleeves or tubes that are inserted into the hole and expanded in order to receive the anchor bolt or screw. Most require a setting tool to expand the hollow tubes and “jam” them against the inside the holes.
Anchors are defined by the bolt diameter, so the hole drilled for female anchors must be larger to accommodate for the thickness of the anchor’s walls. Since the hole is bigger than the bolt, it cannot be drilled with the fixture in place. The hole must be “spotted” by lining up the fixture, marking the concrete where the holes should be made, removing the fixture to drill the hole, then replacing the fixture and bolting it into place.
Drop-in anchors are suitable for concrete only. Lag shields can be used in concrete, brick or block. The lag screw both holds the fixture in place and tightens the shield against the base material.
Male Anchors
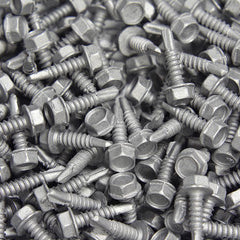
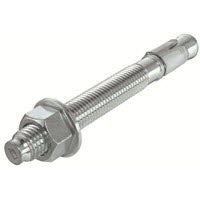
Male anchors are inserted directly into holes drilled to the same diameter as the anchor bolt, so hole-spotting is not necessary. Instead of using a setting tool to tighten the bolt, the installer strikes the bolt with a hammer to drive it into the hole, then, in most cases tightens it to the manufacturer’s torque specification.
When striking the male fasteners such as wedge anchors (for concrete) and sleeve anchors (for concrete, brick, or block) to set them, ensure that the washer is on and the nut is attached to the end threads to protect them from hammer strikes. After hammering, tighten the anchors to their proper torque. Tightening is not required for strike anchors (for use in concrete only); setting the pin provides the torque).
Applications for Anchors
Aside from using only fasteners suitable for the base material, as noted above, there are few hard-and-fast rules for which anchor to use. Drop-ins and wedges are considered heavy-duty concrete anchors, suitable to fastening heavy loads and securing machines or fixtures subject to vibration. Sleeve anchors can serve as replacements for wedge bolts when they become loose.
When anchoring concrete, consider these variables in choosing the right fastener:
Get Quality Florida Fasteners from Power Bolt and Tool
With the most extensive selection of fasteners in Florida, Power Bolt and Tool’s extensive product knowledge can help you select the best products you need for your job. Shop our supply of anchors online and request a quote today.
{"one"=>"Select 2 or 3 items to compare", "other"=>"{{ count }} of 3 items selected"}